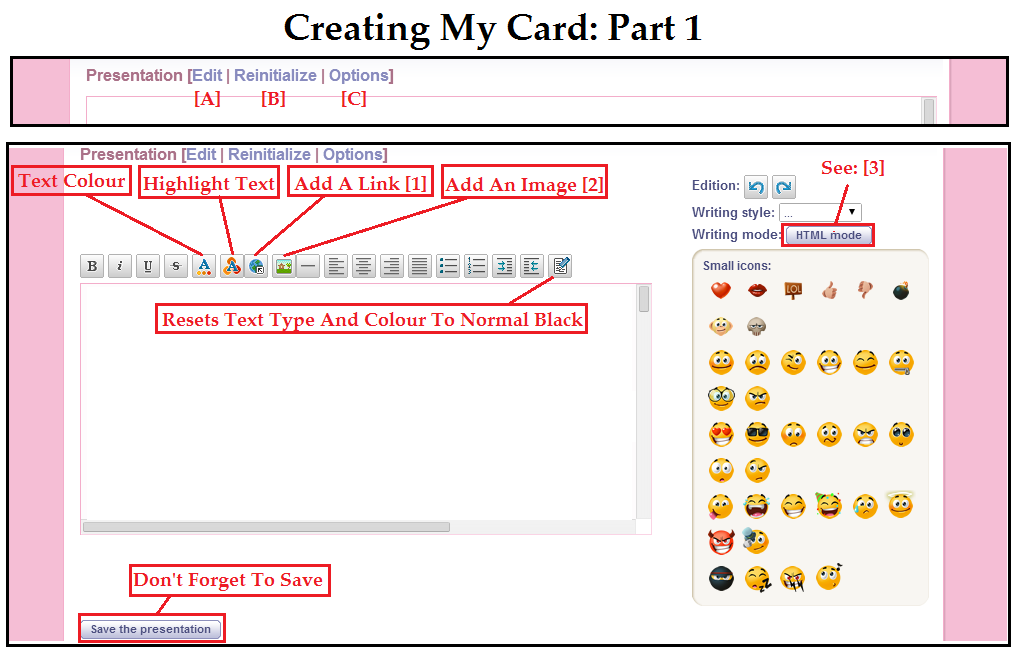
[A] Edit:
When you want to do create/ edit your card, this is the first thing you click.
[B] Reinitialize:
It will delete all your card so you can start again.
[C] Options:
This will format the size of your card. I suggest a good card should be:
Height of the presentation:
800-1000 pixels
Width of the presentation:
Large
[1] Add a link:
To add a link first type something in the text box like "Babydow Family" then highlight it with the mouse. Click the button to add a link, paste the link to the image or website and click ok. Once saved, the words will become clickable so that it will take you to the link.
[2] Add an image:
See "Add a link". However, I suggest just copying and pasting images.
[3] HTML mode:
This is a very important button for when you have a layout which we will come to in Part 2.
What to do with a Layout Code?
Many people, like me, offer Layout services for a price or free.
They will send you a code. What you need to do with this code is:
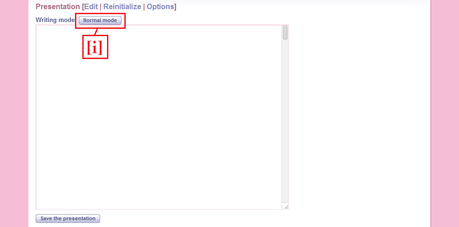
1. "Edit" your presentation.
2. Click on "HTML mode".
3. Copy and paste the code into the text box.
4. Click "Normal mode" (see image [i]).
5. Click on the layout boxes to write in them.
6. SAVE.
Many people, like me, offer Layout services for a price or free.
They will send you a code. What you need to do with this code is:
1. "Edit" your presentation.
2. Click on "HTML mode".
3. Copy and paste the code into the text box.
4. Click "Normal mode" (see image [i]).
5. Click on the layout boxes to write in them.
6. SAVE.
~ Making your own Layout~
STEP 1:
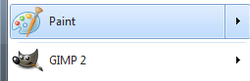
First thing to do is open up Paint or Gimp or Photoshop or whatever you what to use.
For practice and for simple Layouts, I suggest using Paint which is what this tutorial will be done on.
Note: Everyone may not have the same version of Paint but the steps are the same.
First thing to do is open up Paint or Gimp or Photoshop or whatever you what to use.
For practice and for simple Layouts, I suggest using Paint which is what this tutorial will be done on.
Note: Everyone may not have the same version of Paint but the steps are the same.
STEP 2:
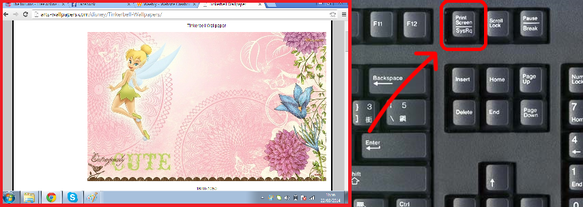
- Find a base image you like [In this case, Tinkerbell].
- Press Print Screen or copy the image.
~ For more complex layouts you can find more than one image and add it to your base image.
- Find a base image you like [In this case, Tinkerbell].
- Press Print Screen or copy the image.
~ For more complex layouts you can find more than one image and add it to your base image.
Step 3:
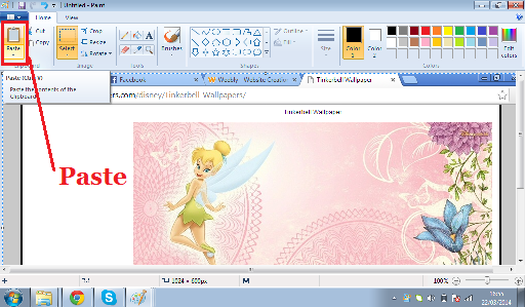
- Paste the Image to Paint.
- Paste the Image to Paint.
Step 4:
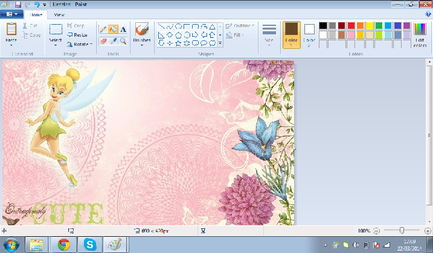
- Arrange it so that you can get rid of the added bits.
- You can also re-size the image if it's to big.
Note: The Biggest Layout you can have on Babydow is 822 x 1000 pixels! Anything smaller is also good.
- Arrange it so that you can get rid of the added bits.
- You can also re-size the image if it's to big.
Note: The Biggest Layout you can have on Babydow is 822 x 1000 pixels! Anything smaller is also good.
Step 5:
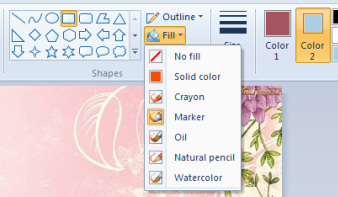
- To do the layout boxes and make them transparent.
- Select the shape you like.
- Select "Fill" then select "
- Don't forget "Color 1" and "Color 2".
- Color 1 is the outline colour and Color 2 is the colour inside the box.
- To do the layout boxes and make them transparent.
- Select the shape you like.
- Select "Fill" then select "
- Don't forget "Color 1" and "Color 2".
- Color 1 is the outline colour and Color 2 is the colour inside the box.
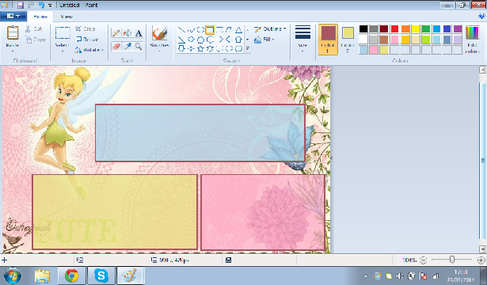
Step 6:
- Once you worked out how many boxes you want and in what colour just place them where you want.
- Remember to leave a space at the top of each box if you want box titles and a layout title.
- Once you worked out how many boxes you want and in what colour just place them where you want.
- Remember to leave a space at the top of each box if you want box titles and a layout title.
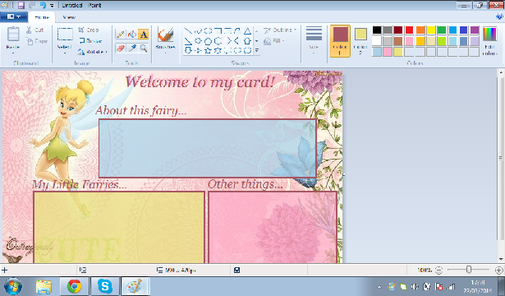
Step 7:
- Add your titles!
- Try not to go in the boxes.
- Save it
- Your done!
Feel free to experiment, go wild! (but dont go bigger than 822 x 1000 pixels.
- Add your titles!
- Try not to go in the boxes.
- Save it
- Your done!
Feel free to experiment, go wild! (but dont go bigger than 822 x 1000 pixels.
~ Uploading your own Layout ~
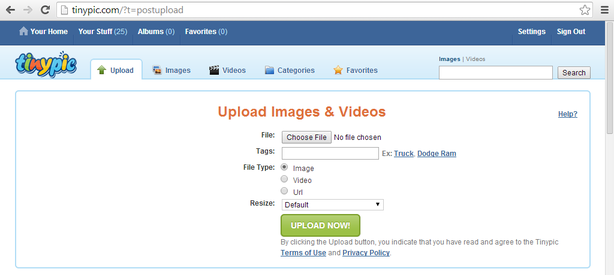
- Go to:
tinypic.com
- Create an account [Free]
- Click "Choose File".
- Select your layout.
- Click "Upload Now!"
tinypic.com
- Create an account [Free]
- Click "Choose File".
- Select your layout.
- Click "Upload Now!"
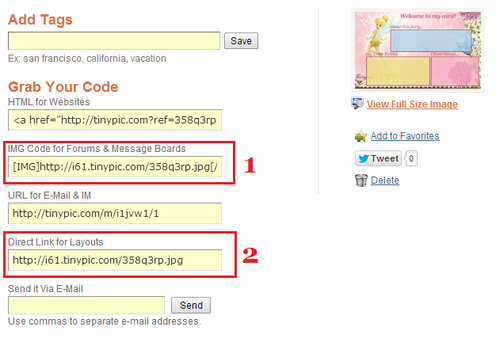
1. On Babydow, when you want to post an image on a forum or post an image in a private message to someone this is what you use or you post this:
[IMG]your image link here[/IMG]
2. This is the link you need to do the layout code (my version of coding).
[IMG]your image link here[/IMG]
2. This is the link you need to do the layout code (my version of coding).
~ Coding your own layout~
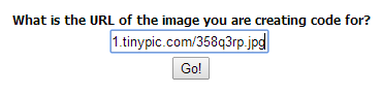
Use your link and paste it into:
http://www.neotacular.com/?go=x-blog
<--- Like The Image & click "Go!"
http://www.neotacular.com/?go=x-blog
<--- Like The Image & click "Go!"
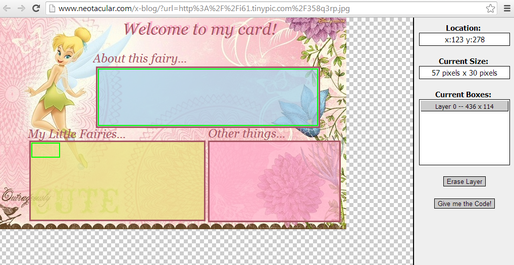
This should pop up -------------->
Click a corner of the box then let go then click the other corner of the box, a green box should be in it.
Do this for every box!
Click a corner of the box then let go then click the other corner of the box, a green box should be in it.
Do this for every box!
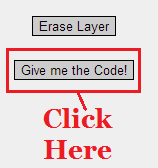
Once done with the boxes, Click on "Give me the Code!".
Another page will load [image below].
Another page will load [image below].
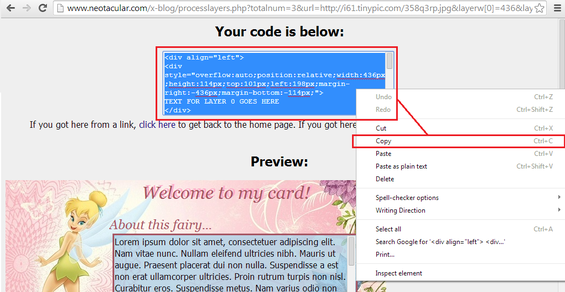
Now the code they give you may look like it works but it will not be compatible with babydow however, this has given you the important numbers needed!
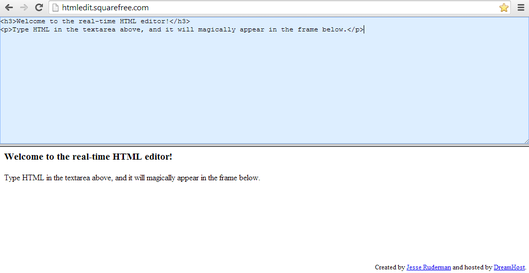
In a new tab, open up:
http://htmledit.squarefree.com/
And delete the text that is already there and paste in the code.
http://htmledit.squarefree.com/
And delete the text that is already there and paste in the code.
Once you've done that, it will give you a preview! Like I said though, it will not work on babydow so you need to chop and change [see part 2].
The actual CODING part! PART 1
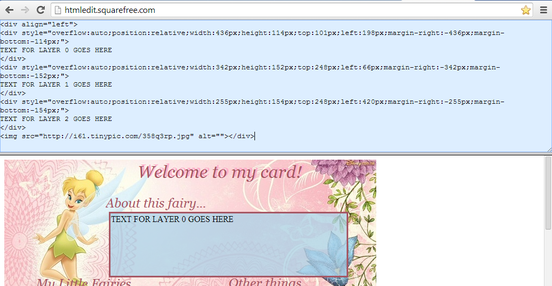
ORIGINAL CODE WAS THIS:
<div align="left"><div style="overflow:auto;position:relative;width:436px;height:114px;top:101px;left:198px;margin-right:-436px;margin-bottom:-114px;">TEXT FOR LAYER 0 GOES HERE</div><div style="overflow:auto;position:relative;width:342px;height:152px;top:248px;left:66px;margin-right:-342px;margin-bottom:-152px;">TEXT FOR LAYER 1 GOES HERE</div><div style="overflow:auto;position:relative;width:255px;height:154px;top:248px;left:420px;margin-right:-255px;margin-bottom:-154px;">TEXT FOR LAYER 2 GOES HERE</div><img src="http://i61.tinypic.com/358q3rp.jpg" alt=""></div>
NOW CUT DOWN THE CODE TO THE IMPORTANT NUMBERS AND LINK:width:436px;height:114px;top:101px;left:198px;
width:342px;height:152px;top:248px;left:66px;
width:255px;height:154px;top:248px;left:420px;
http://i61.tinypic.com/358q3rp.jpg
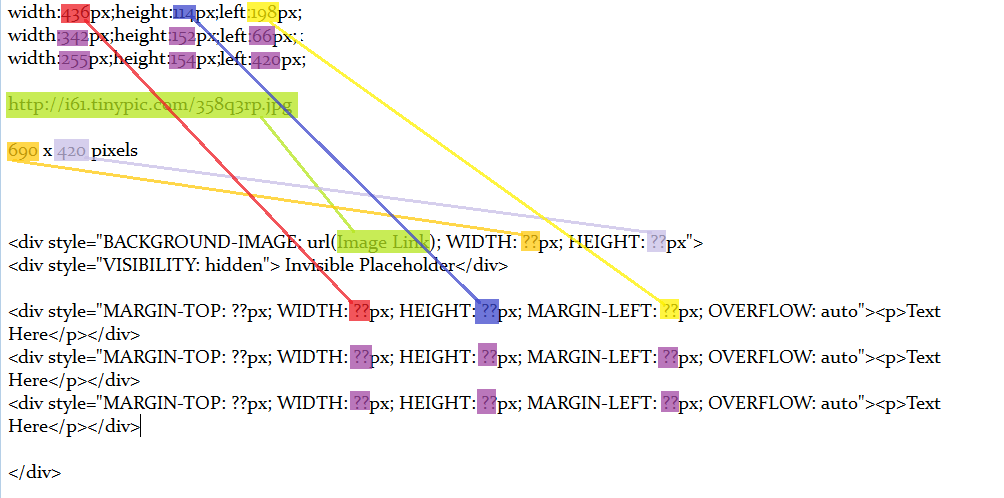
NOW GET RID OF THE NUMBERS FOR THE "top:??px":
width:436px;height:114px;left:198px;
width:342px;height:152px;left:66px;
width:255px;height:154px;left:420px;
http://i61.tinypic.com/358q3rp.jpg
This is the basis of your layout... You also need the Dimensions of your layout (Just hover over your image and it should show you or look at "properties"
FINAL:
width:436px;height:114px;left:198px;
width:342px;height:152px;left:66px;
width:255px;height:154px;left:420px;
http://i61.tinypic.com/358q3rp.jpg
690 x 420 pixels
The actual CODING part! PART 1
Beginning bit:
<div style="BACKGROUND-IMAGE: url(Image Link); WIDTH: ??px; HEIGHT: ??px">
<div style="VISIBILITY: hidden"> Invisible Placeholder</div>
Middle bit [one for each box]:
<div style="MARGIN-TOP: ??px; WIDTH: ??px; HEIGHT: ??px; MARGIN-LEFT: ??px; OVERFLOW: auto"><p>Text Here</p></div>
End bit:
</div>
NOW, Basically you fill in the new code with your "Final Code".
ORIGINAL CODE WAS THIS:
<div align="left"><div style="overflow:auto;position:relative;width:436px;height:114px;top:101px;left:198px;margin-right:-436px;margin-bottom:-114px;">TEXT FOR LAYER 0 GOES HERE</div><div style="overflow:auto;position:relative;width:342px;height:152px;top:248px;left:66px;margin-right:-342px;margin-bottom:-152px;">TEXT FOR LAYER 1 GOES HERE</div><div style="overflow:auto;position:relative;width:255px;height:154px;top:248px;left:420px;margin-right:-255px;margin-bottom:-154px;">TEXT FOR LAYER 2 GOES HERE</div><img src="http://i61.tinypic.com/358q3rp.jpg" alt=""></div>
NOW CUT DOWN THE CODE TO THE IMPORTANT NUMBERS AND LINK:width:436px;height:114px;top:101px;left:198px;
width:342px;height:152px;top:248px;left:66px;
width:255px;height:154px;top:248px;left:420px;
http://i61.tinypic.com/358q3rp.jpg
NOW GET RID OF THE NUMBERS FOR THE "top:??px":
width:436px;height:114px;left:198px;
width:342px;height:152px;left:66px;
width:255px;height:154px;left:420px;
http://i61.tinypic.com/358q3rp.jpg
This is the basis of your layout... You also need the Dimensions of your layout (Just hover over your image and it should show you or look at "properties"
FINAL:
width:436px;height:114px;left:198px;
width:342px;height:152px;left:66px;
width:255px;height:154px;left:420px;
http://i61.tinypic.com/358q3rp.jpg
690 x 420 pixels
The actual CODING part! PART 1
Beginning bit:
<div style="BACKGROUND-IMAGE: url(Image Link); WIDTH: ??px; HEIGHT: ??px">
<div style="VISIBILITY: hidden"> Invisible Placeholder</div>
Middle bit [one for each box]:
<div style="MARGIN-TOP: ??px; WIDTH: ??px; HEIGHT: ??px; MARGIN-LEFT: ??px; OVERFLOW: auto"><p>Text Here</p></div>
End bit:
</div>
NOW, Basically you fill in the new code with your "Final Code".

The long way is by using the "Real time editor". (http://htmledit.squarefree.com/)
Just play with the numbers and see if the "Text Here" goes up or down.
Leave a small space from the top for the boxes to look right, like the example below:
Just play with the numbers and see if the "Text Here" goes up or down.
Leave a small space from the top for the boxes to look right, like the example below:
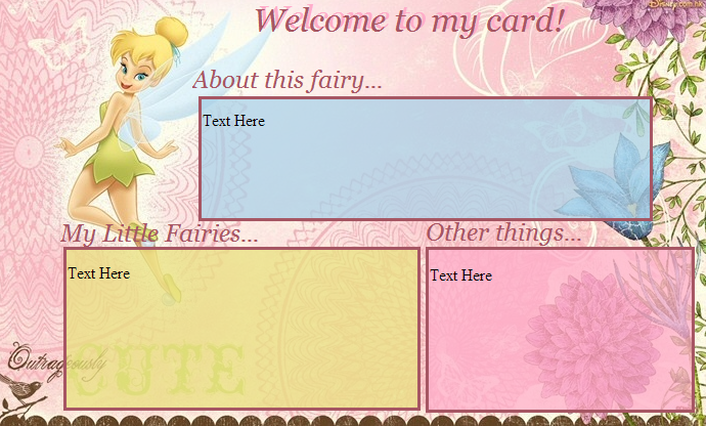
The finished code is below, feel free to use it or make your own!:
<div style="BACKGROUND-IMAGE: url(http://i57.tinypic.com/2cr6qhc.jpg); WIDTH: 690px; HEIGHT: 420px">
<div style="VISIBILITY: hidden"> Invisible Placeholder</div>
<div style="MARGIN-TOP: 75px; WIDTH: 436px; HEIGHT: 114px; MARGIN-LEFT: 198px; OVERFLOW: auto"><p>Text Here</p></div>
<div style="MARGIN-TOP: 35px; WIDTH: 342px; HEIGHT: 152px; MARGIN-LEFT: 66px; OVERFLOW: auto"><p>Text Here</p></div>
<div style="MARGIN-TOP: -150px; WIDTH: 255px; HEIGHT: 154px; MARGIN-LEFT: 420px; OVERFLOW: auto"><p>Text Here</p></div>
</div>
ENJOY!
